Hatching a Plan


Incubating chicken eggs on the small farm
Incubating eggs for personal use can be rewarding, but for many people it is a daunting one as well. The thought of maintaining an incubator for three weeks can be a put-off, but this task doesn’t have to be this way. For thousands of years, people have used artificial incubation to hatch eggs. Without the benefit of fans, heaters, and thermometers ancient civilizations such as the Egyptians used simple hatching houses made out of mud, using fires for heat sources to successfully hatch eggs.
Writings have been found that indicate ancient chicken-keepers could tell if the temperature was right simply by holding the eggs.
So, with modern technology, a little know-how, and some hard work, anyone can be successful at hatching their own eggs. What follows will help get you started with incubating your own eggs, but please remember to always refer to your incubator’s manual for any specifics.
Start with a clean start
The first and most common cause of poor hatchability is sanitation, or lack thereof. Bacteria is everywhere; on us, our chickens, in the air, water, feed, egg shells, and even on incubators. Without proper sanitation, bacteria can travel through the porous shell and into the egg causing contamination. An incubating egg is the perfect habitat for bacteria; it is warm, liquid, and has plenty of available nutrients.
An incubator must be cleaned and disinfected before you use it. Notice how I said cleaned and disinfected, not just one or the other? This should be a two-step process.
First, you need to clean the incubator. Now when I say “clean,” I mean giving a good scrubbing and removing any dirt and hatch residue. Removing this debris will allow a disinfectant to come into contact with the surface of the incubator and be many times more effective. When all the debris has been removed you can then disinfect the incubator.
To disinfect you will need a chemical disinfectant (bleach, for example), but make sure that the disinfectant has been diluted properly (follow all manufacturers labels and instructions). Use the disinfectant to sanitize all surfaces inside the incubator. Pay extra attention to any surface that will come into contact with the eggs.
Next, clean the hatching eggs. Eggs need a good scrubbing only to remove debris. Washing the eggs with soap and water can actually have the opposite effect. Washing eggs with water will remove the protective cuticle from the outside of the shell, making it easier for bacteria to enter. Even the water used can allow bacteria to move freely through the pores in the egg shell to cause contamination.
Collection plate
The second area of concern is care of the eggs and storage before they are placed in an incubator. Eggs to be used for hatching should be collected as quickly as possible, especially during extreme hot or cold temperatures. Extreme temperatures—and temperature changes—can be detrimental to the embryo. Collecting frequently also reduces risk of dirt, debris, cracks or damage.
Collected eggs with any adhering debris or dirt should not be placed in the incubator as they could contaminate other eggs. At this point you may want to label your eggs so you will know what they are.
If eggs are to be stored before incubation they should be stored in a cool damp room. The temperature of the room needs to be approximately 55° to 60° F. with a relative humidity of 70 to 75 percent (wet bulb reading of 50° to 52 ℉.). At these storage conditions, embryonic development will halt and eggs will not lose too much moisture. Eggs should be stored large end up, at a slight angle, and should be turned twice a day. It is important to store eggs no longer than absolutely necessary. Every day that an egg is stored will decrease hatchability.
Hatching eggs should be stored less than 10 days to ensure maximum hatchability. After 10 days the likelihood of that egg hatching is very low, and after three weeks the chance is almost zero.
When eggs are removed from storage, they should be placed in a room and allowed to warm to 70° to 75° F. This will prevent condensation from forming and reduces chances of contamination. Use only clean eggs that are not cracked or misshapen.
Incubator mid-term test
Next, we need to look at is whether or not your incubator is functioning properly. There are three critically important items you need to check: fan, heat source, and thermometers. These are easy to check and generally just require turning on the incubator 24 to 48 hours before setting eggs.
This leads into another excellent rule of thumb: Always turn your incubator on 24 hours prior to setting eggs—if anything is broken, this will give you time to either fix or replace the broken part and the incubator will be at the correct temperature and humidity when you set eggs. Having accurate thermometers is critical to incubation success. Thermometers that are off by even a degree or two can have disastrous effects.
Incubators come in two types: forced air or still air. A forced air incubator will have a fan (or multiple fans) to circulate air throughout the incubator. In a still air incubator, cool air enters through the bottom, is heated and then rises to the top of the incubator where the eggs are. Forced air incubators are generally larger and the more popular of the two.
Any temperature recommendations you see in the next few paragraphs are for forced air incubators. Still air incubators are recommended to operate at a temperature 1° to 2 ℉. higher. However, these numbers are general recommendations and you should always follow the manufacturer instructions for your specific incubator.
Call for time and temperature
At this point everything is sanitized, the incubator has achieved proper temperature and humidity, and our eggs are warmed up to room temperature. Let’s start incubating.
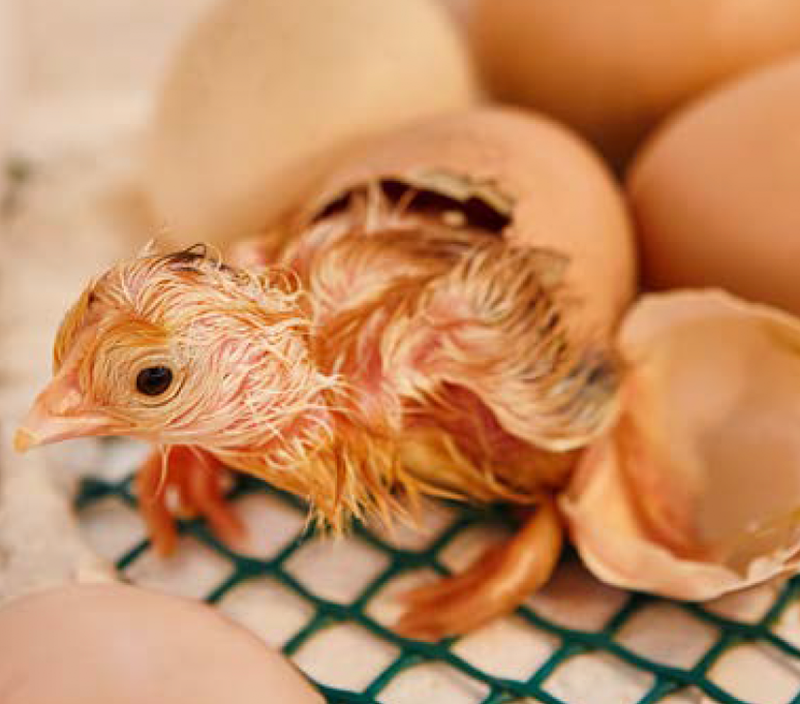
Chicken eggs should be incubated at approximately 100℉. Most home incubators can maintain between 99° and 102° F., and that will be fine. A temperature range greater than this can cause problems. At the proper temperature, embryonic development will proceed at a normal rate and chicks will hatch in 21 days. If the temperature is off by one degree—either high or low—chicks could hatch early, late, or not at all. Therefore, care should be taken to avoid any temperature fluctuations outside of these ranges. To help maintain temperature, incubators should be kept in a 70° to 75℉ room. Many home incubators are poorly insulated and keeping them in a room at this temperature will help.
Along with temperature. relative humidity must be maintained to ensure a proper hatch. To measure humidity, you will need a “wet bulb” thermometer and a normal thermometer. The difference in temperature between the two thermometers is the relative humidity, and the greater the difference the lower the relative humidity. For example, if both thermometers show the same temperature, the humidity is 100%. A proper humidity for incubator is approximately 55%, with an incubating temperature of 100° F., the wet bulb will need to average 85° F., ranging between 83° and 88° F.
If you are having trouble maintaining high enough humidity and your incubator is using a pan of water to raise humidity, put a sponge in the pan to increase surface area and evaporation.
The turn of the…egg
During incubation, eggs will need to be turned frequently, at least four times a day. If your incubator has an automatic turner this will be easy. However, if you don’t have one you will have to turn the eggs yourself.
How you turn your eggs will depend on how they are positioned in the incubator. In incubators that allow eggs to stand on up, eggs should be held at a 45-degree angle and rotated through a 90-degree angle to rest at 45 degrees on the other side.
For incubating eggs laying on their sides, they will need to be turned from one side to the other. Simply putting a mark such as an “x” and “o” on either side will help you keep track of what side the egg should be on. Eggs need to be turned at evenly-spaced intervals. An automatic turner uses timer to do this, but if you are turning by hand you will have to do the best you can.
If you cannot turn them at night, eggs should be turned as late as possible and then again first thing in the morning. Turning eggs prevents embryo from sticking to the shell and dying—important during the first week of incubation.
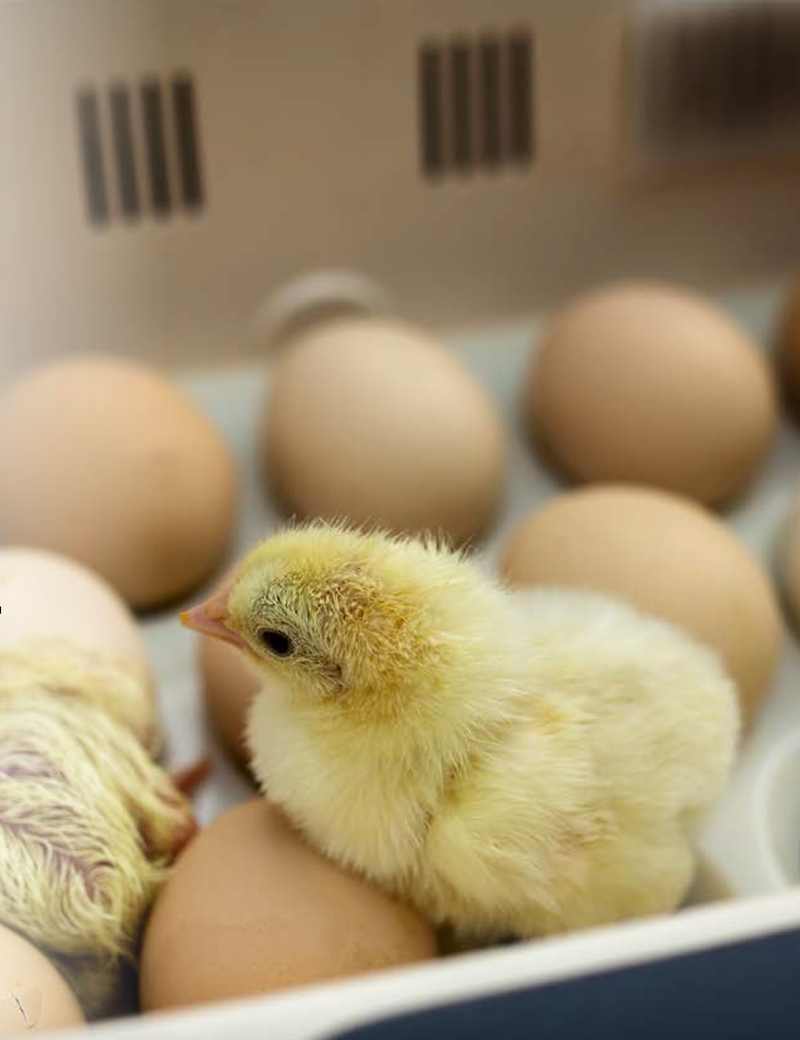
As embryos grow and develop they will produce waste gases. These gases will accumulate in the incubator and if not ventilated can eventually smother and suffocate the embryos. Many incubators will have ventilation holes that can be open or closed to allow for air exchange. Incubators that do not will have to be opened for approximately five minutes, twice a day. Great care must be taken to maintain temperature and humidity when opening incubators for ventilation or any reason, especially during the final three days.
As the embryos approach their final three to four days of incubation, several steps need to be taken to ensure a successful hatch. Relative humidity must be increased to approximately 60%, at 100° F. dry bulb temperature—that is an 84° to 86° F. wet bulb measurement. Temperature of the incubator must be watched carefully, as incubators are prone to overheating during the last few days. At this time eggs do not need to be turned.
On the day of hatch, humidity needs to be raised again, this time to around 65% or 89° F. After the majority of the chicks have hatched incubator temperature can be lowered to 95° F.
What could go wrong? Plenty
Several things can go wrong during incubation, leading to poor chick quality or decreased hatchability. Below are common problems and their likely causes.
- Problem
- Likely Cause
- Chicks hatch early with blood navels
- Temperature too high
- Prolonged hatch
- Temperature too high
- Delayed Hatch >21 days to pip
- Temperature too low
- Chicks with short down
- Temperature too high, humidity too low
- Mushy, dead, bad odor
- Bacterial infection, poor sanitation
- Chicks too small
- Temperature too high, humidity too low
- Chicks with adhering shell parts
- Humidity too low at hatch
- Chicks smeared with egg contents
- Low average temperature, high humidity
- Deformities
- Chance, poor parent nutrition
- Rough navels
- Temperature too high, humidity too low
The bottom line
Remember that the keys to successfully incubating eggs are proper sanitation, temperature and humidity. While any hatch should be considered successful, commercial incubators may only have a hatch of 80 percent. Always refer to your incubator’s manual for any specifics regarding temperature and humidity.
Tags:Hands-on Help


Chicken Whisperer is part of the Catalyst Communications Network publication family.